Purchasing an SSL for your shared hosting in Godaddy is costly, and needs to renew every year. Before, it is impossible to install free Let’s Encrypt SSL to Godaddy shared hosting as it requires root access to the server to install the SSL and authenticate the server.
Now, there is a tool called ZeroSSL that lets you use Let’s Encrypt to verify your website without the needs of accessing the root of your server.
To do this, go to https://zerossl.com/free-ssl. Fill up the details with your information and the domain you want the SSL to be installed (It is recommended to include the www version of your site). leave the two textboxes below empty and accept the TOS. Once done, press the NEXT button.

It will generate the CSR key that is needed for the SSL authentication. Just click Next again after that.

This time, it will generate the RSA private key. Once it is generated, download the RSA Private Key and the CSR Key. Press Next once done.

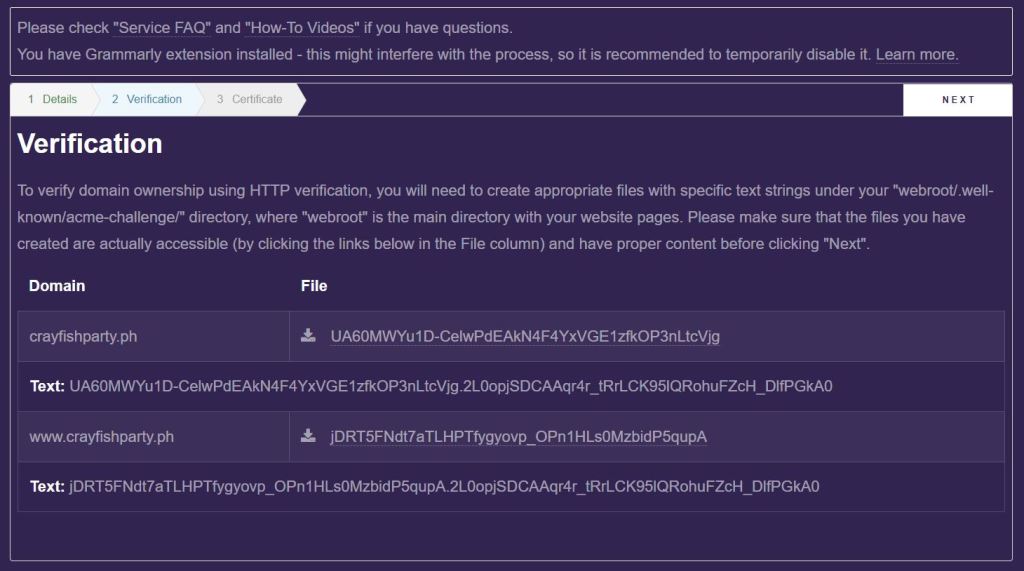
The next step will require you to authenticate your domain with Let’s Encrypt. You need to upload the files to your website directory (eg. public_html/.well-known/acme-challenge/). First, you need to download the files.

Use the File Manager of Godaddy and upload the files at your_website_directory/.well-known/acme-challenge/.

Once done, go back to ZeroSSL and press the Next button. (If you encounter an error, just re-upload the new verification code for the domain with the problem).
It will now generate the files needed to upload it to SSL in Godaddy Cpanel. Download the two files domain-crt.txt and domain-key.txt.

In your Godaddy Cpanel, find and open SSL/TLS under Security.

Then go to Install and Manage SSL for your site (HTTPS). Click Manage SSL sites.

In the Manage SSL sites, you need to scroll down and find the Install an SSL Website section. Now fill up the data with the following:
At Domain, find the domain that you’d like to add the SSL. It should look like yourwebsite.com (+subdomains: autodiscover, cpanel, mail, webdisk, webmail, www).
At Certificate: (CRT). Copy and paste the first part of the content of domain-crt.txt you downloaded from ZeroSSL. Make sure to include the — BEGIN CERTIFICATE — and the — END CERTIFICATE —.

At the Private Key (KEY). Copy and paste the content of domain-key.txt you downloaded from ZeroSSL.
Lastly, in Certificate Authority Bundle: (CABUNDLE). Copy and paste the last part of domain-crt.txt.
Once done, press the Install Certificate button.

You should now get a message saying “SSL Certificate Successfully Updated”.

That’s it! You successfully install the FREE https or SSL on your website. To renew the SSL, you just have to repeat the process every 3 months.


